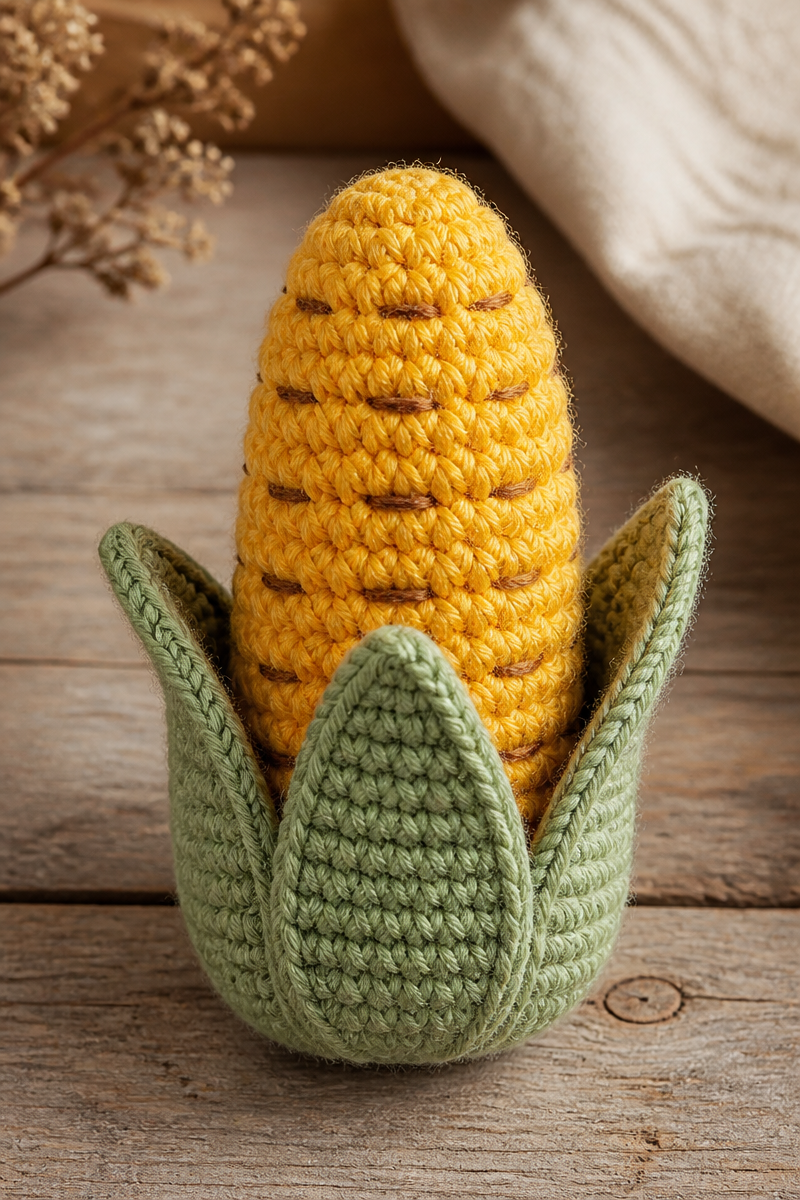
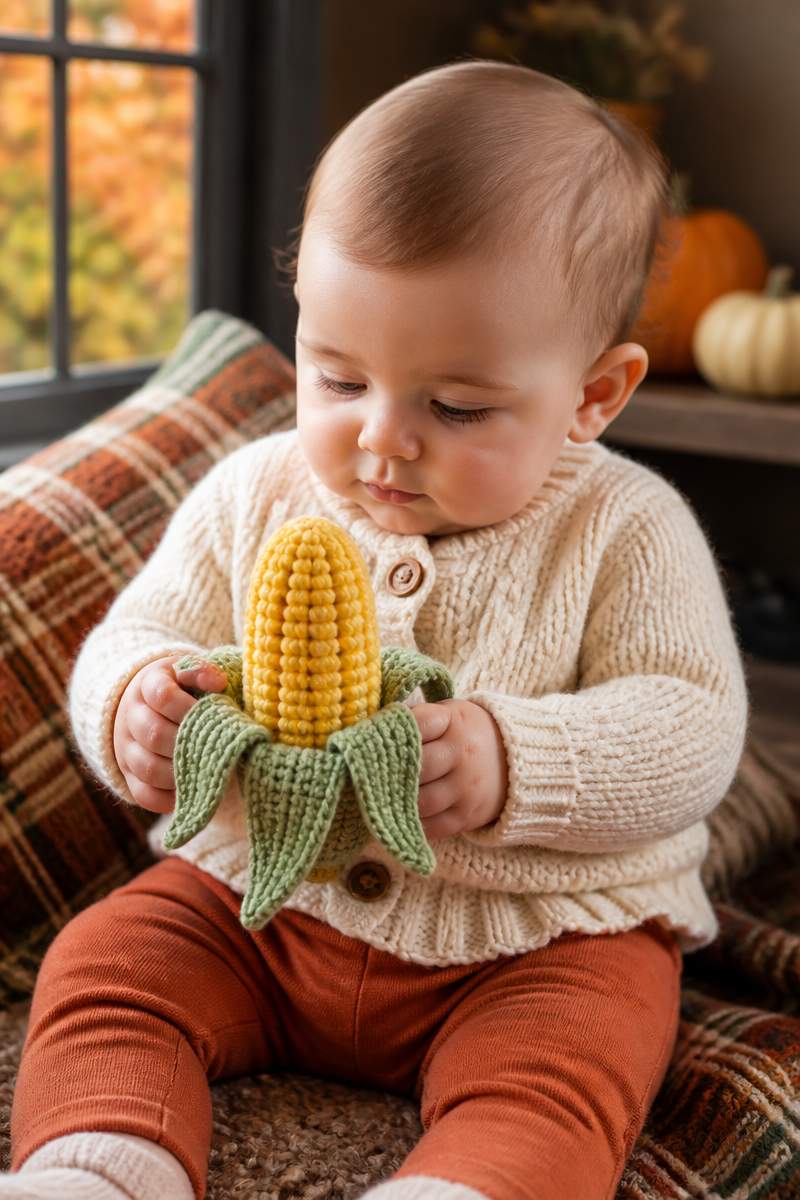
This baby corn stalk toy is worked in three parts: a stuffed corn cob shaped with rounds of single crochet and decreases to close the top, a kernel texture added with simple embroidery on the surface, and four flat husk leaves that attach around the base. The corn cob uses a tightly crocheted amigurumi-style tube, starting from a magic ring and shaping with precise increases and decreases to form a tapered cylinder closed at the top. The husk leaves are small tapered rectangles worked flat in rows, each ending in a pointed tip created by decreases at both edges. The finishing consists of sewing the leaves evenly around the cob’s base, giving a natural peel-back effect.
The design focuses on simplicity and dimensional accuracy. Using worsted weight yarn with a 5mm hook balances firmness and softness, allowing the cob to hold its shape well while maintaining a gentle hand suitable for a toy. Brown embroidery floss adds subtle kernel details more delicately than yarn would, keeping the surface detailed without bulk. The flat leaves contrast the round cob and introduce a realistic silhouette that stands on its own or fits in a baby playroom or nursery.
Materials were chosen for durability and ease of care—worsted weight acrylic or cotton blends perform well, and the polyester stuffing maintains shape and resilience if washed carefully. The size is small enough to fit in a crib or stroller without safety concerns, and the sewn-on leaves provide tactile interest for babies exploring textures.
Why You’ll Love This Corn Stalk Toy
The combination of amigurumi shaping for the corn cob and flat crochet for the husks gives a clean, clear interpretation of a baby corn stalk. The round cob is constructed with intentional stitch count repeats and exact decreases for a flawless closure at the top, while the subtle kernel texture added with embroidery avoids bulky stitching and adds tactile realism. This project is quick to finish, requiring only about a dozen rounds for the cob and three small rows per leaf. Its compact size and simple construction make it ideal for gifting or a quick nursery accent. The choice of worsted weight yarn balances softness with stitch definition and structure, and the leaves’ gentle shaping gives a natural peel-back silhouette that adds charm.
Materials
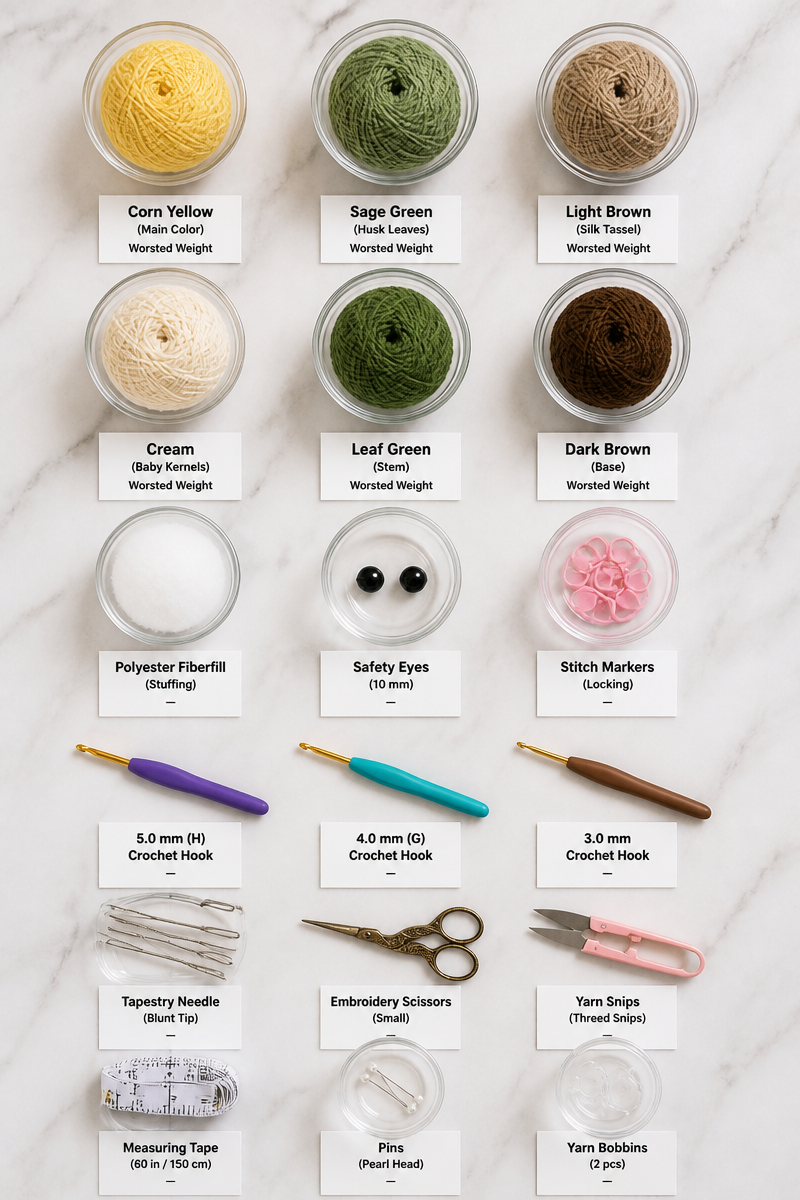
- US H/8 (5.0mm) crochet hook, firm but smooth for worsted weight yarn
- Worsted weight #4 yarn: approximately 25 yards golden yellow for the cob, 10 yards sage green for the husks
- Brown embroidery floss for kernel details, about 3 yards
- Polyester fiberfill stuffing, enough to firmly fill the cob
- Yarn needle for sewing and weaving ends
- Stitch marker to mark rounds when needed
Gauge
16 sc and 10 rounds = 4″/10 cm in single crochet, worked tightly in the round (amigurumi tension)
Finished Size(s)
- Corn cob height: 3.25″ (8.25 cm)
- Corn cob circumference: 4.5″ (11.5 cm) at widest point (rounds 4–10)
- Husk leaves length: 2.25″ (5.75 cm) tapering from 9 sts wide to 5 sts wide
Special Stitches and Techniques
No special or designer stitches are used. The cob starts with a magic ring: create an adjustable loop, crochet 6 sc into it, then pull closed to form a tight center. Increases and decreases follow straightforward amigurumi patterns:
- Increase (inc): 2 sc in one stitch
- Decrease (dec): single crochet two stitches together (sc2tog) worked by inserting hook through two stitches, yarning over and pulling through both in one stitch.
The husk leaves use standard decreases at row edges by skipping the first or last stitch of a row before turning.
Abbreviations
- ch: chain
- sc: single crochet
- inc: increase (2 sc in same stitch)
- dec: decrease (single crochet 2 stitches together)
- st(s): stitch(es)
- rnd(s): round(s)
- rep: repeat
Yarn Tips
Using worsted weight yarn with a 5.0 mm hook, aim for a firm tension to ensure the cob holds its shape when stuffed. Acrylic blends work well for resilience and washability; cotton provides a matte texture but can be stiffer. Avoid overly loose tension to prevent stuffing leakage. For the sage green leaves, the same yarn type ensures consistent texture, but choose a yarn that doesn’t split to maintain smooth decreases at edges. Brown embroidery floss is best added after finishing the cob, as the smooth, thin thread allows for fine kernel detail without bulky coverage. Use a sharp tapestry needle to avoid splitting the yarn when stitching embroidery lines.
Options for Substitutions
- Use a 4.5 mm hook if your tension is tight, producing a slightly smaller cob and leaves.
- Substitute cotton worsted weight yarn for a matte, natural fiber look; expect slightly firmer fabric.
- Use a blended acrylic/wool worsted yarn for softness but test for felting in washing.
- Replace sage green yarn with olive or moss green for a more earthy husk tone.
- Use yellow-variegated yarn for the cob to simulate natural corn color variation.
- If embroidery floss is unavailable, use worsted yarn held double for kernel texture, but the texture will be bulkier.
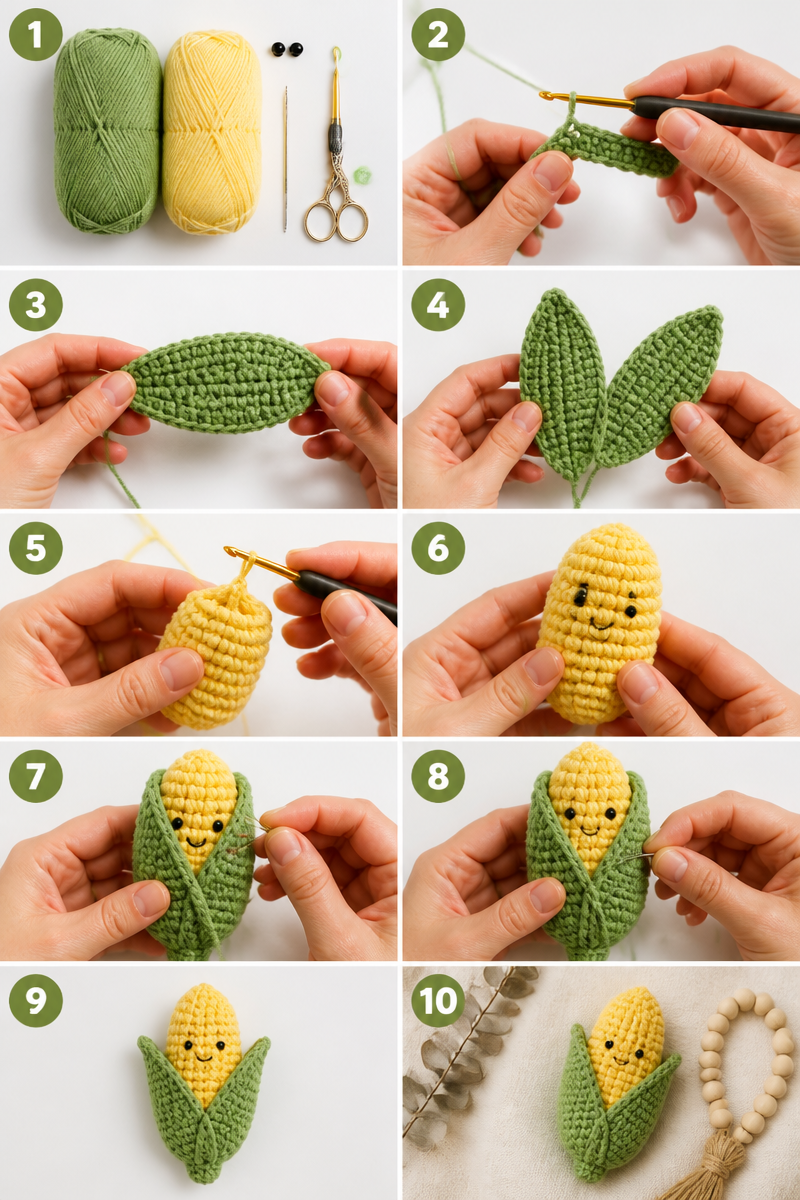
Corn Cob (make 1)
With golden yellow yarn, use a magic ring.
Rnd 1: 6 sc in ring (6 sts)
Rnd 2: inc in each st (12 sts)
Rnd 3: sc 1, inc repeat 6 times (18 sts)
Rnds 4–10: sc in each st around (18 sts per rnd), stuff firmly after rnd 4 and continue stuffing gradually through rnd 10
Rnd 11: sc 1, dec repeat 6 times (12 sts)
Rnd 12: dec around (6 sts)
Fasten off, leave a long tail, stuff remaining space firmly, and sew the top closed with the yarn tail.
Kernel Texture
With brown embroidery floss and yarn needle, stitch small horizontal lines around the corn cob in rows spaced evenly from rounds 4 to 10. Space each line about 3-5 stitches apart horizontally and 1 row apart vertically to mimic kernels, avoid overlapping stitches to maintain cob flexibility.
Husk Leaves (make 4)
With sage green yarn:
- Row 1: ch 10, sc in 2nd ch from hook and each ch across (9 sts), turn
- Row 2: dec first st and last st (skip 1 st at each edge), sc across remaining 7 sts, turn
- Row 3: dec first and last sts again, sc remaining 5 sts, fasten off leaving a tail for sewing
Assembly
Arrange the 4 husk leaves evenly around the base of the corn cob, slightly overlapping so they appear to peel back naturally. Sew each leaf securely to the base edge of the cob, attaching into the lower stitches on rounds 4 or 5 for stability. Weave in all yarn and floss ends inside the cob or along the leaves.
Watch Out for These Mistakes
Tension inconsistency can create uneven shaping in the cob. Maintaining a firm but not tight gauge ensures smooth increases and decreases, preserving the round shape. Skipping the final decrease round or not closing the top hole neatly will leave stuffing exposed. Stuff firmly but avoid overstuffing, which stretches stitches and causes shaping to distort.
When stitching kernel lines, work evenly spaced lines without pulling the embroidery floss too tight to prevent puckering the fabric. For the husk leaves, precise decreases at row ends are essential to create sharp pointed tips; skipping or uneven decreases will produce blunt or misshapen leaves.
Sewing the leaves evenly around the base requires care. Uneven spacing or loose joins cause the leaves to droop or flare incorrectly. Use pins or stitch markers to hold placement before sewing.
Care and Washing Instructions
Machine wash on gentle cycle in cold water using a mesh laundry bag to protect the toy. Use mild detergent without bleach. Reshape cob and leaves while damp and lay flat or dry on low heat. Avoid fabric softeners that may reduce yarn resilience. Hand washing is preferred for longevity and to preserve embroidered kernel lines.
Questions About Making This Corn Stalk Toy
Q: Can I make the cob larger or smaller?
A: Adjust hook size or yarn weight. Larger cob requires more rounds or a larger initial stitch count with correspondingly calculated increases and decreases.
Q: What yarn fibers work best?
A: Acrylic for softness and durability; cotton for a firmer, natural feel; blends offer balance. Avoid loosely spun yarns that fuzz or pill easily.
Q: How tight should my tension be?
A: Tight enough to hold firm stuffing without gaps, but not so tight that stitches distort. Maintain consistent tension throughout.
Q: Can I add more kernel embroidery?
A: Yes, but keep lines subtle and evenly spaced to avoid stiffening the fabric.
Q: How do I avoid leaf edges curling?
A: Ensuring accurate decreases and even tension on leaves will produce flat shapes.
Q: How do I fasten off the cob top neatly?
A: Leave a long tail to close the top opening snugly by running the yarn needle through the front loops and pulling tight, then weave safely inside.
Q: Is this suitable as a baby toy?
A: Yes, if securely sewn and washed thoroughly before use. Avoid small embellishments that can detach.
This toy balances durability, shape integrity, and subtle texture, making it a practical and charming crochet object. Share your finished corn stalk to show the crisp shaping and tactile kernel detail achieved through simple construction and finishing.