Creating this Crochet Baby Doctor Rattle Toy has been a delightful experience for me. There’s something truly special about bringing a bit of whimsy into the world with your own hands. It’s pure comfort to make, allowing you to tap into your creative side while also crafting something that will surely bring smiles to little faces. This pattern is perfect for those quiet evenings when you want to unwind, offering a therapeutic rhythm as you work through each stitch.
The key components of this pattern include worsted weight yarn in white, a splash of red felt, and a 3.5mm hook. This combination creates a soft texture that is wonderful for babies. We also have a plastic rattle insert, which gives the toy its delightful sound. The finished piece boasts a charmingly simple style, inviting little ones to explore while ensuring safety with every stitch you make.
This pattern is straightforward, breaking down the process into manageable steps. You will begin by crocheting a small round shape using single crochet, gradually increasing and then decreasing to close it. You’ll insert the rattle before finishing, lightly stuffing it for a gentle feel, and then add a felt cross for that adorable medical detail. Finally, you’ll weave in all loose ends to create a polished finish.
Imagine making this adorable rattle as a unique baby shower gift or for a cherished little one in your life. This toy is not just a plaything; it’s a beautiful handmade gift that carries a piece of your heart. It’s a lovely addition to any nursery or a delightful item to sell at craft fairs, fulfilling your creative passion while spreading joy.

Why You Will Love This Crochet Baby Doctor Rattle Toy
- Works up quickly: Ideal for those in search of a swift project to complete.
- Simple stitches: The pattern employs basic crochet techniques, making it accessible for beginners.
- A wonderful gift: Handmade toys are cherished and memorable gifts for new parents.
- Engaging for babies: The rattle insert adds a fun auditory element that intrigues infants.
- Cute and charming design: The added felt details make this rattle visually appealing and adorable.
Worsted Weight Yarn Tips
When working with worsted weight yarn, selecting the right type is crucial for achieving a smooth finish. Opt for a soft acrylic blend or cotton yarn, as these options provide durability and gentle textures. To avoid splitting, ensure your hook size matches closely with your yarn weight. It’s also beneficial to crochet with a slightly looser tension, which helps in maintaining the yarn’s integrity and showcases your stitches beautifully.
Options for Substitutions
- Use cotton yarn instead of acrylic for a more breathable option.
- Swap out red felt for any vibrant colors to match the nursery theme.
- Experiment with different hook sizes if you prefer a tighter or looser fabric.
- Try other yarn brands that may offer better softness or durability.
- Use a safety rattle insert for added security while maintaining the design.
- Incorporate embellished felt shapes for added flair and personalization.
Watch Out for These Mistakes
One common pitfall when crocheting the round shape is dropping stitches at the end of your row. This can lead to uneven edges, so keep an eye on your last stitch. Also, make sure to correctly follow the increasing and decreasing steps. If you skip a chain space, it may leave gaps in your rattle, affecting its shape.
When inserting the rattle piece, ensure it sits snugly inside before closing; otherwise, it may shift about, creating discomfort for babies. Finally, as you sew on the felt cross, avoid pulling too tightly on the yarn; this might warp the shape of your rattle. Weaving in all your loose ends is essential as well to create a neat finish—don’t skip this step!
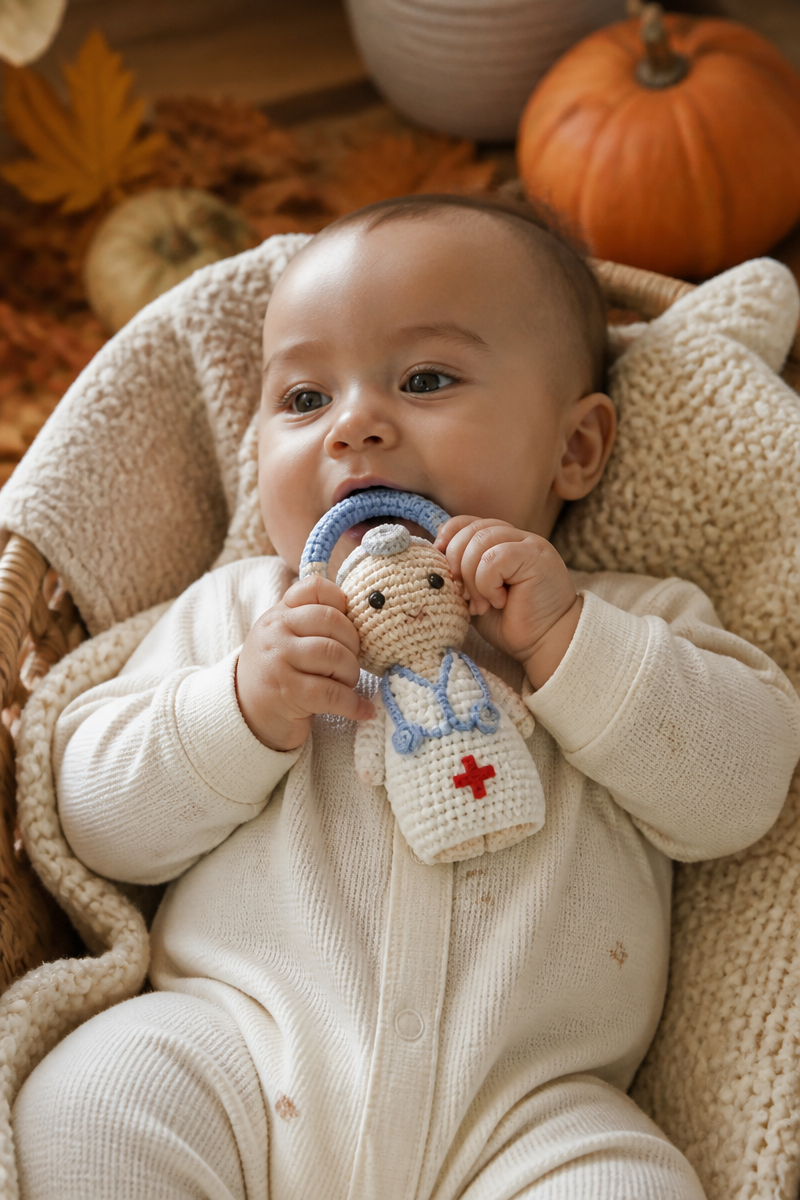
What to Pair With This Crochet Baby Doctor Rattle Toy?
You might consider pairing this rattle with other crochet projects such as a matching baby blanket, a simple hat, or soft booties. Each of these pieces complements the rattle beautifully and creates a lovely set that new parents will cherish. Making a full gift bundle is not only thoughtful but also showcases your crafting skills.
Care and Washing Instructions
For washing, it’s best to hand wash your rattle with cool water and a gentle detergent. This ensures that any yarn doesn’t lose its shape or softness. If machine washing, use a delicate cycle and place the rattle in a mesh laundry bag to protect it.
For drying, lay the rattle flat on a towel to help absorb excess moisture and prevent it from stretching out of shape. Avoid hanging it, as this can distort the toy. Blocking is generally unnecessary for this project due to its structure, but if you desire a crisper shape, you can gently steam block the finished piece.
Pattern Info
Prep Time: 30 minutes
Make Time: 1-2 hours
Total Time: 1.5-2.5 hours
Level of Difficulty: Beginner
Sizing: Approximately 5 inches in diameter
Gauge and Sizing Notes
Estimated sizing and gauge details for this pattern: Checking your gauge is vital to ensure your rattle maintains the intended shape and sound. The finished project should approximately measure 5 inches in diameter, which is just the right size for tiny hands to grasp.
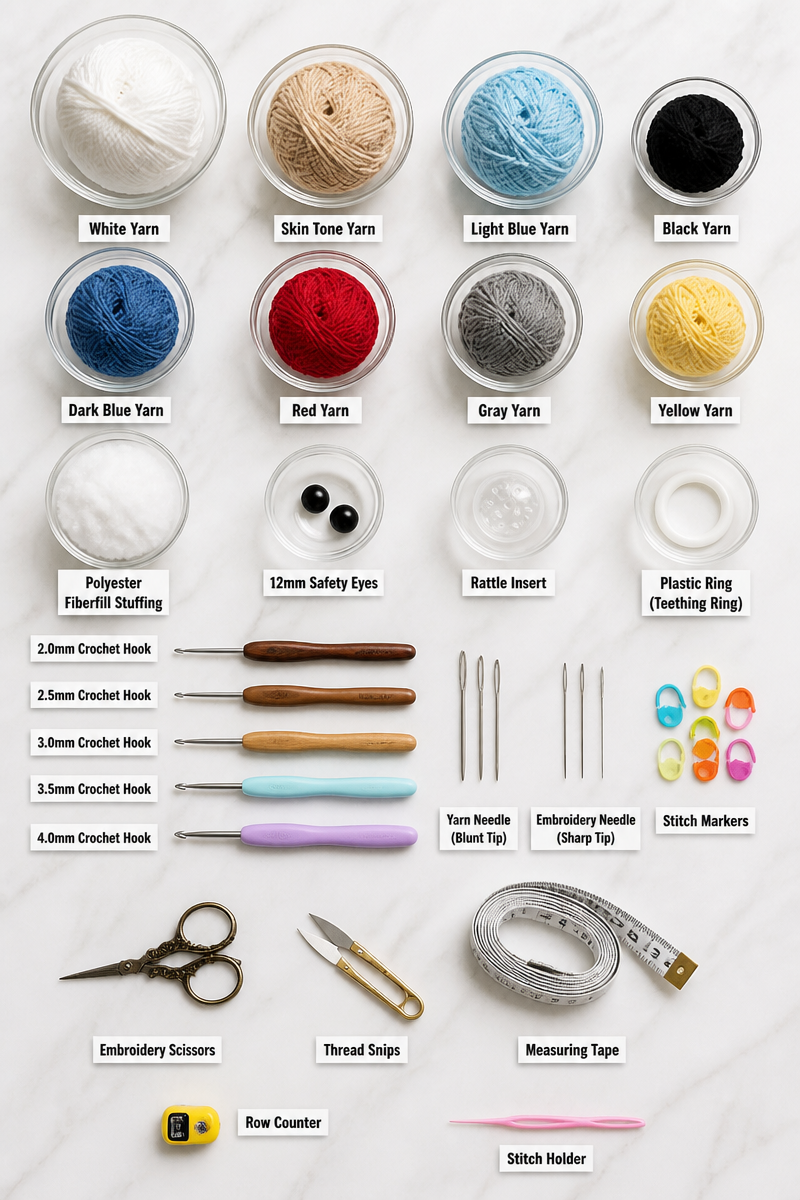
Materials Needed
- Worsted weight yarn in white
- Red felt
- 3.5mm hook
- Plastic rattle insert
- Felt for detail
- Yarn needle
Step-by-Step Instructions
Step 1: Create the Base Shape
Start by crocheting a small round shape. Use single crochet stitches and increase evenly around to create a circle. This step forms the basis for the rattle.
Step 2: Insert the Rattle Piece
Once you have reached your desired size, carefully insert the plastic rattle insert. Make sure it fits snugly inside without any force.
Step 3: Stuff the Rattle
Lightly stuff around the rattle insert. Aim for a gentle fill that allows the rattle to maintain some give, making it pleasant for babies to hold.
Step 4: Create the Medical Detail
Cut a small cross or other medical detail from the red felt and sew it onto the front of the rattle. Ensure it is securely attached to withstand little hands exploring it.
Step 5: Close and Weave in Ends
Finish closing your round shape by continuing to single crochet around. Weave in all loose ends carefully to ensure a neat finish and avoid any hazards.
Creating this sweet Crochet Baby Doctor Rattle Toy is truly a gratifying project. Not only do you have a functional and delightful item, but you also have a piece of art that conveys love and care. I encourage you to dive into this pattern, share your beautiful creations, and discover the joy of crafting for little ones. Happy crocheting!